http://gohnotes.wordpress.com/2008/06/17/throw-escapes-made-easy/#more-519
Throws
Normal Throw
Unlike most fighting games throws are a basic, if not essential, part of anyone's arsenal in VF. They execute in twelve (12) frames (exceptions below) and have a range equal to a little under a standing . These moves are useful for breaking down the defence of an opponent who simply likes to stand and block your attacks.
High Throw
High Throws are the basic throw. They are all executed with the command with optional directional inputs depending on the character you are using, check the VFDC Movelists to see which combinations are available for your character.
High Throws connect when:
Opponent is standing (evading, blocking, dashing, moving, NOT crouching or hopping)
During the recovery of an attack that recovers standing (high, mid, and some lows)
During the recovery of a missed throw
Opponent is doing an attack reversal
Opponent is low throwing (missed throw)
High Throws miss when:
Opponent is crouching or in a low stance (dashing, blocking or passive)
Opponent is in execution or active hit frames of an attack
Opponent is staggered
Opponent is crumpling
Opponent is wall-staggered
When a High Throws fails to connect, a throw miss animation occurs and your character will be vulnerable (unable to Guard) for a short period of time.
Low Throw
Low Throws are throws to grab a crouching opponent with. They are executed by inputting one or more directions together with . Not all characters are capable of Low Throws.
Low Throws connect when:
Opponent is crouching
Opponent is in the crouching animation of the crouch dash
Opponent is guarding low
During the recovery of a move that recovers low
Opponent is doing a low reversal
Opponent is in a mid crumpled state
Low Throws miss when:
Opponent is standing (still, moving, blocking, staggered or dashing)
Opponent is in execution or active hit frames of an attack
List of characters with Low Throws: Aoi, El Blaze, Goh, Jeffry, Pai, Vanessa and Wolf.
Back Throw
Back Throws act like any other high or low throw, except that they only work when the opponent is Back Turned and cannot be escaped. Everyone has at least one of these and can execute it through hitting , some characters have options beyond that but this always works.
Any High (or Low) Throw executed on a Back Turned (or Crouching Back Turned) opponent will automatically become a Back Throw, regardless of the directional input used. For example, performing against a Back Turned opponent will result in a regular Back Throw.
Some characters can perform additional directional throws on a Back Turned opponent.
Some characters can perform Catch Throws on a Back Turned opponent.
Side Throw
Like Back Throws, Side Throws are simply High or Low Throws but then executed on an Opponent’s side. Everyone has High Side Throws and all are executed with .
Any throw attempt at the opponent's side will result in a Side Throw. For example, performing against a Side Turned opponent will result in a regular Side Throw.
Some characters can perform additional, directional throws on a Side Turned opponent.
Some characters can perform Catch Throws against a Side Turned opponent.
Guaranteed Throw
A guaranteed throw is throwing your opponent in a situation where they can not recover from his current animation quickly enough to avoid it through attacking or moving out of range. This occurs after the opponent fails an evade or after they miss an attack that leaves you enough time to move in and throw or you block a move that recovers in 12 frames or more.
Zero Frame Throw
Commonly abbreviated as 0f Throw.
Normally a throw includes a grab animation before it connects. This grab animation lasts for 12 frames during which time the opponent can initiate an attack or duck/rise to interrupt or avoid your throw. Zero Frame Throws however execute without this animation.
Any High or Low Throw executed when the opponent is passive will execute as a zero frame throw. This means an opponent that is either standing still or blocking, whether crouching or standing for low and high throws respectively. Zero Frame throws will also occur if the opponent is in a Catch Throw animation.
Further information can be found here.
Catch Throw
These are throws with special animations such as Goh’s . Depending on the character they have varying execution times and ranges. All Catch Throws are inescapable except for the two Defensive Move Catch Throws (+ during Defensive Move with either Wolf or Vanessa in Offensive Stance) that can be escaped in the same manner as Side Throws.
Catch Throws have the ability to beat (or eat) an attack where a Normal Throw would otherwise fail. Specifically, so long as the attack has not yet reached it's hit frames, and is on the same level (standing or crouching), then the Catch Throw will connect successfully. Compare this to a Normal Throw that will fail against any attack that's already executing.
Normal Throw vs Attack
1 2 3 4 5 6 7 8 9 0 1 2 3 4 5 6 7 8 9 0
normal throw exe act
attack exe act
Normal Throw vs Attack: In this example, even though the Normal Throw started executing first, by the time it reaches it's active (grab) frames there's already an attack executing. Here, the Normal Throw fails.
Catch Throw vs Attack
1 2 3 4 5 6 7 8 9 0 1 2 3 4 5 6 7 8 9 0
catch throw exe act
attack exe act
Catch Throw vs Attack: Similar to the previous example, the throw began executing first, and by the time it reaches it's active frames there's already an attack executing. However, since this is a Catch Throw, it has the ability to eat an attack. Note, however, that if the attack reached it's active frames first, then the attack will beat the Catch Throw.
Note: The frame duration for the catch throw exe and active phase were made up to illustrate the concept.
In addition to attacks that normally beat throws (that is low, jumping and back-turning attacks), Catch Throws will also lose out to any Normal or Zero Frame Throw.
Hit Throw
These are inescapable throws that can only be performed as extension to certain moves. They require the leading move to Hit or Counter Hit, but some will work on Guard as well. They will not work on a Side Turned opponent, but some can work on a Back Turned opponent (e.g. Wolf's Frankensteiner ).
Technically these are throws but in effect they work like striking attacks that are simply the next part in the string and end with a downed opponent.
Examples:
Brad's (Counter Hit)
Vanessa’s (Offensive Stance) (Counter Hit)
Goh’s (Guard or Hit)
Throw Escape (TE)
Attacks beat or clash with Throws, but sometimes you’ll not want to attack because you’re in disadvantage or want to gain a better position in the ring. In such instances you can input Throw Escapes to secure yourself against throws.
Escaping throws is done by inputting throw commands during your opponent's throw attempt. The window of time to input throw escapes extends from 10 frames before your opponent's throw input to 11 frames after it. To escape a throw you need to use the same command the opponent used to end his throw input. This means that Wolf’s Giant Swing () is escaped by inputting *. Neutral () throws are escaped by simply using . After successfully escaping a throw you usually recover with a small to moderate advantage.
*Note that means pressing forward and not right. It’s important to discern between right and left and forward and backward in this. Wolf’s Giant Swing ends with a forward command, so you’ll need to use forward throw escape to beat it, never mix the words left and right into discussions about throw escapes as people will start spinning circles around each other in no time flat.
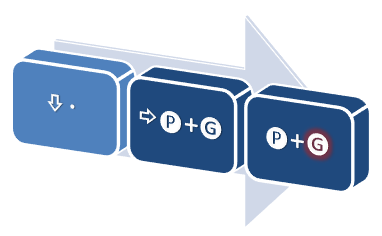
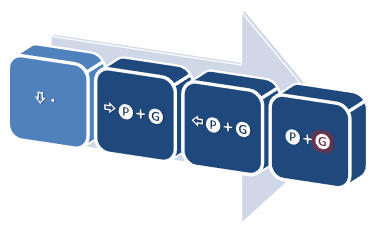
Multiple Throw Escapes
During a moment you are vulnerable to throws you will want to secure yourself against more than a single throw direction, especially when facing throw heavy characters such as Wolf or Goh. This is done by inputting more than one throw escape before the animation of your last move ends. This is usually easy with large throw guaranteed moves.
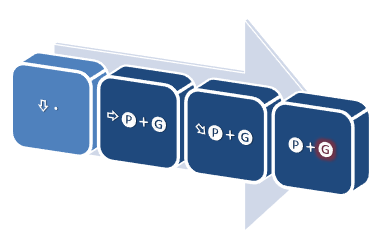
Throw Escape with Guard (TEG)
Throw Escape Guard and Evade Throw Escape Guard are a technique used to resume blocking as fast as possible while entering throw escapes allowing you to guard against both strikes and throws. It is done by holding down the button that was part of the last throw escape. The must be held down by the time the recovery period for your previous move ends; this will stop your throw escape attempts from coming out as a throw whiff animation vulnerable to counter hit.
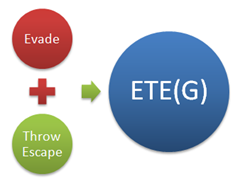
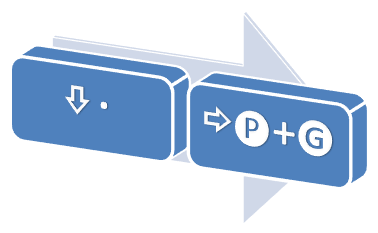
Evade Throw Escape (ETE)
Inputting Throw Escapes while Evading provides protection against throws during your evade, which is normally weak against throws. It is done by simply inputting throw escape commands right after the command to evade.
Combinations
Evading, Multiple and Guarded Throw Escapes can be used in combination with one another to seriously limit the amount of options the opponent has to land blows successfully. Especially when also combined with dashes, crouch dashes and the like.
Note: This also creates the impressive abbreviations you may encounter during discussions such as DTEG, ETTEG, etc.
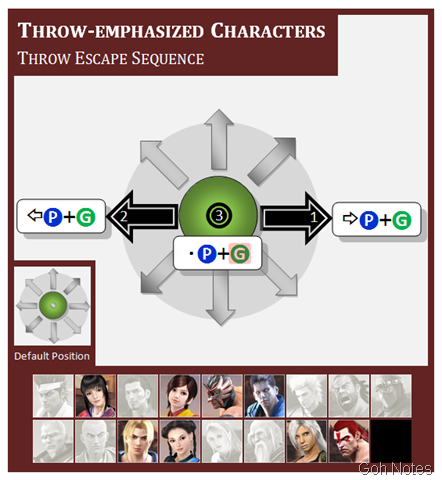
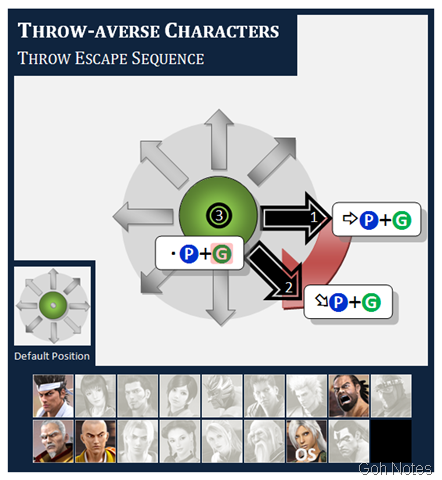
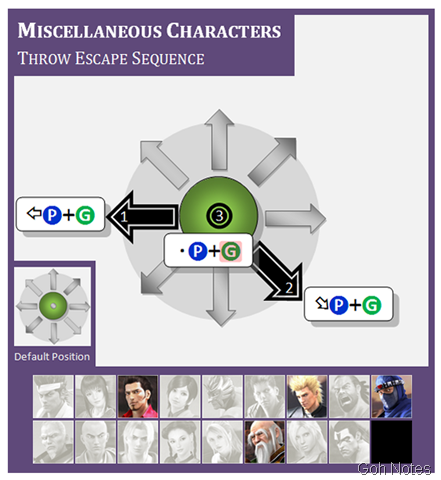
Throw Escape Priorities
This guide provides analysis of each character's throws and gives suggestions on which escape directions are most popular as well as suggesting techniques on how to best escape multiple throw directions.
Side Throw Escapes
Side Throws have their own specific rule for escapes which do not follow regular Throw Escape convention. Instead of inputting a matching direction with the opponent's throw, Side Throw Escape inputs are solely dependent on which side of your character's body the opponent is grabbing from, the left or right hand side.
Thus, Side Throws are escaped by a Left hand side () or Right hand side () input. In this context, the and inputs do not refer to “back” and “forward” inputs, but rather Left and Right hand side inputs. The first golden rule of the Side Throw Escape is:
Side Throws on the Left Hand Side of your character are escaped with Left ()
Side Throws on the Right Hand Side of your character are escaped with Right ()
The second golden rule of the Side Throw Escape is:
You cannot enter multiple Side Throw Escapes.
Consider the following diagram.
Here we're looking from behind the Player's perspective. If the opponent attempts a Side Throw from the left, then the escape input is . Similarly, if the opponent is on the right, then the escape input is .
Regardless of whether you are Player 1 or Player 2, the above rule always applies. Now while this may sound simple in theory (e.g. if the opponent is on my left, then I enter left ), determining which side (left or right) is exposed to the opponent in the heat of battle can prove to be a challenge.
There are primarily two ways in which you can have your side exposed to the opponent:
The opponent changes their lateral position (e.g. DM, OM, attack) into the background or foreground
An opponent's action (e.g. attack, throw, throw escape, etc) causes you to recover Side Turned
In these situations, if the opponent is within range and you're just standing guard or helpless in recovery, then a side throw could be on the cards, and your only way of escaping it successfully is to choose the correct direction – left or right.
Case 1: Opponent Changed Position
There are a number of ways for the opponent to shift into the foreground or background such as performing a Defensive or Offensive move. Also, some characters have attacks with built-in lateral movement that allow them to move to your side while attacking. In these cases where the opponent has moved off-axis, you may be in a situation where you're vulnerable to a side throw. The diagram below illustrates how to successfully escape the side throw when the opponent is either in the foreground or background, from both Player 1 and Player 2's perspective.
Again, the golden rule for escaping side throws still applies here (opponent on the left side, side throw escape with the left direction input).
Tip
If you observe the joystick inputs for both players, you may notice the following trend:
If the Opponent is in the Foreground, enter Forward
If the Opponent is in the Background, enter Back
You can remember by “fore-to-for, back-to-back”.
Case 2: You're Side Turned
When you're in a Side Turned situation, either your left or right hand side will be closest, and hence exposed, to the opponent and this is the direction you need for the Side Throw Escape input.
Consider the following diagrams for Player 1, but ignore the green arrowed-circle around the player for now:
1P Side Turned Foreground 1P Side Turned Background
Player 1 has been Side Turned toward the foreground, resulting in the left hand side being exposed to the opponent. In this case, Player 1 would escape with Left . Player 1 has been Side Turned toward the background, resulting in the right hand side being exposed to the opponent. In this case, Player 1 would escape with Right .
For Player 2 getting Side Turned we have:
2P Side Turned Foreground 2P Side Turned Background
Player 2 has been Side Turned toward the foreground, resulting in the right hand side being exposed to the opponent. In this case, Player 2 would escape with Right . Player 2 has been Side Turned toward the background, resulting in the left hand side being exposed to the opponent. In this case, Player 1 would escape with Left .
Now if you've read this far without going insane at all the left, right, foreground and background references being thrown around, give yourself a pat on the back. But if you are feeling a little dizzy right now, there are a couple of tips to help you with Side Throw Escapes when you're Side Turned.
Tip 1: Green Circles
In the diagrams above you were told to ignore the green arrowed circles around the player. Now go back and look at them and notice that the throw escape input, for both Player 1 and Player 2, is always in the direction of the circle. So, the only thing to remember is Player 1's circle travels clockwise and Player 2's is opposite – anti-clockwise.
If you can visualise these circles during the game, just enter the escape that travels with your circle! The diagram below provides a summary:
Player 1 Clockwise Player 2 Anti-Clockwise
Tip 2: Flip-Flop
At the beginning of the Side Throw Escape section you were told not to follow the general Throw Escape input convention. That is, don't think of the input as “back”, and as “forward”. Well, this tip requires you to do just that, and your “back” or “forward” escape solely depends on whether you're facing foreground or background:
If Side Turned into the Foreground, enter Back
If Side Turned into the Background, enter Forward
Refer to the above 1P and 2P images with green circles to see that this holds true.
The name Flip-Flop arises from the fact that if you're facing the foreground you input back and if facing the background you input forward . In other words, you flip-flop from the fore-to-back, or back-to-for.
Below are a couple of Youtube videos that demonstrate this tip:
Side Throw Escapes (Japanese)
VF5 Tutorial: Escaping Side Throws (English)
Throw Clash
A throw clash occurs when a striking attack is launched at a throwing character, the two characters lunge out at one another and then reel back, leaving them at neutral frames. There are a number of requisites for this to occur, these are:
It's a high or low throw (not catch or zero frame, a zero frame throw will have already executed anyway)
The striking attack is not a low attack which recovers crouching,
The striking attack does not recover back turned
The striking attack is not in an aerial state at the moment the hit frames start
The following formula returns true:
Execution speed of normal throw < Attack Execution Speed / 2 (round down) + Current frame advantage or disadvantage ( or 12 < [exe/2] + frame diff )
Meaning a clash will occur if the throw goes into hit frames before half the animation of the striking attack has passed.
For more technical information of throw clashes and their effects on gameplay look here. This discussion is not recommended reading for beginners. For now just know that throws will clash with striking attacks when the striker attacks from a disadvantaged situation or with a very slow move.

http://gohnotes.wordpress.com/2008/06/06/evading-throw-escape-guide/#more-501